Inside: Learn how to make your own daddy doll for military kids. Under $5 cost. Perfect for military kids going through deployment.
I love the military but deployments aren’t easy on anyone. Not the service member, not the spouse left behind, and definitely not the kids left at home without their mommy or daddy.
We read military kid books about deployment and PCSing, but a lot of parents have turned to daddy dolls as a way to cope with a parent being away.
A young child can give their parents a hug or a kiss even from thousands of miles away. Or an angry teen can throw the daddy doll against the wall when they find out they have to PCS again and leave their friends AGAIN.
Military life is tough – our military kids, our tough little dandelions, deal with a lot.
Why not try to find a way to help young military kids cope with that tough life?
When my husband deployed an Air Force service offered to get us pillow cases with their daddy’s face on it. Or I could pay a service to get a daddy doll made for us. But those daddy dolls were expensive – $25 a pop.
So with just two kids, I would have spent $50 on little dolls. Nope, wasn’t going to happen. So I made my own.
Daddy Doll Tutorial
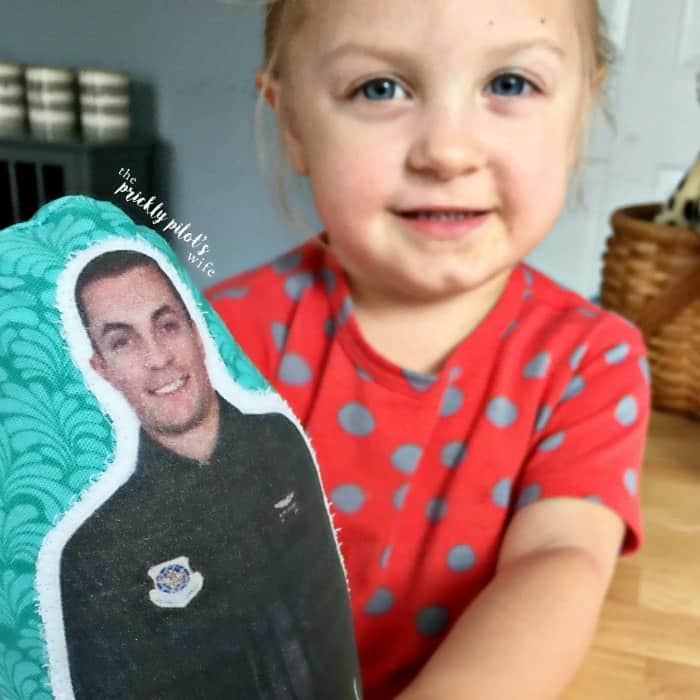
They aren’t perfect but they definitely suffice and I think they ended up being more personal. And the great news? It cost me $5 each! Yay! I saved $40 by making my own!
What you need:
- Printable Iron-on Fabric or just Printable Fabric
- scrap fabric and thread
- stuffing
Quick Instructions:
- Take a good picture of Daddy or Mommy in uniform in front of a contrasting surface. So if the uniform is pretty dark, try to stand in front of a white surface. This makes a future step a LOT easier.
- Upload the picture to your computer and go to this background deleting site
- Follow the instructions on the site to delete the background of your image. Download a PNG.
- Print your PNG on a full piece of that printable fabric. Print out two if you want your doll to be double-sided.
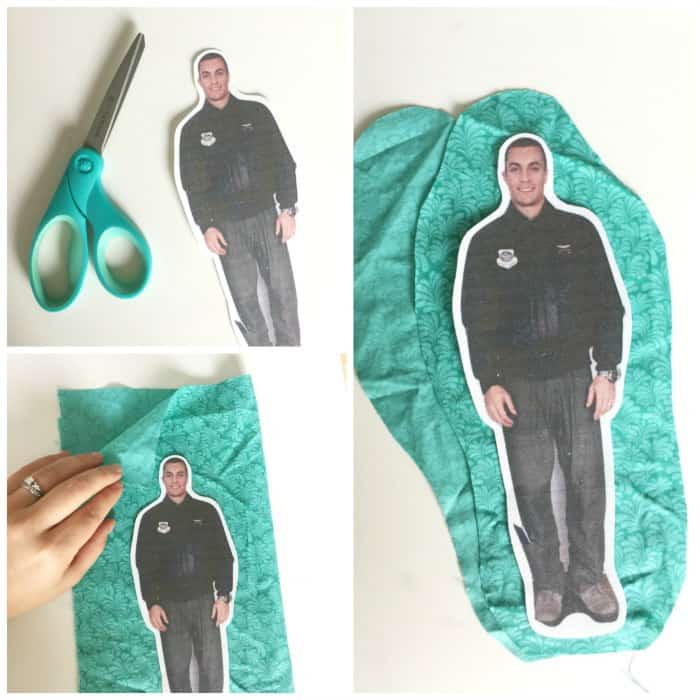
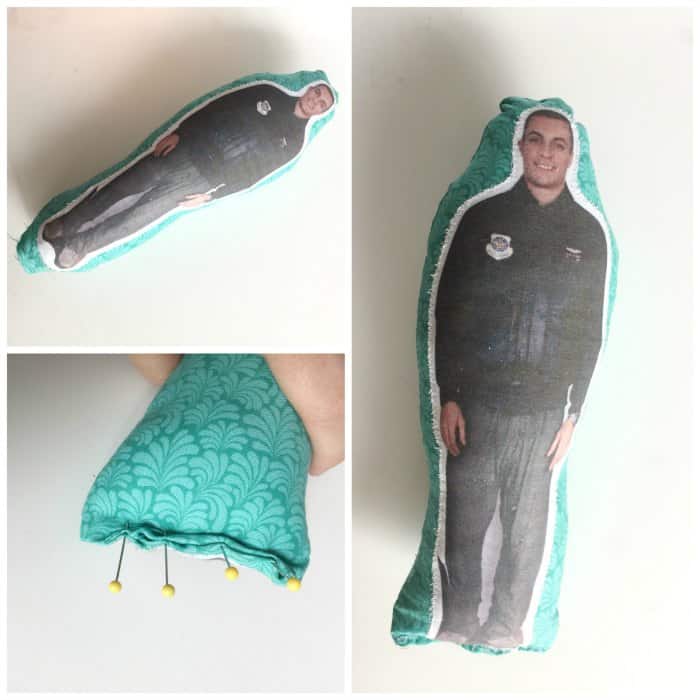
- Roughly cut out the picture of mommy or daddy. I cut about an inch outside of his body so that he’d have a little white outline.
- Cut the fabric a couple inches outside the picture of mommy and daddy. Less fabric will yield a smaller doll, more fabric will give you a larger doll. I went for a smaller doll.
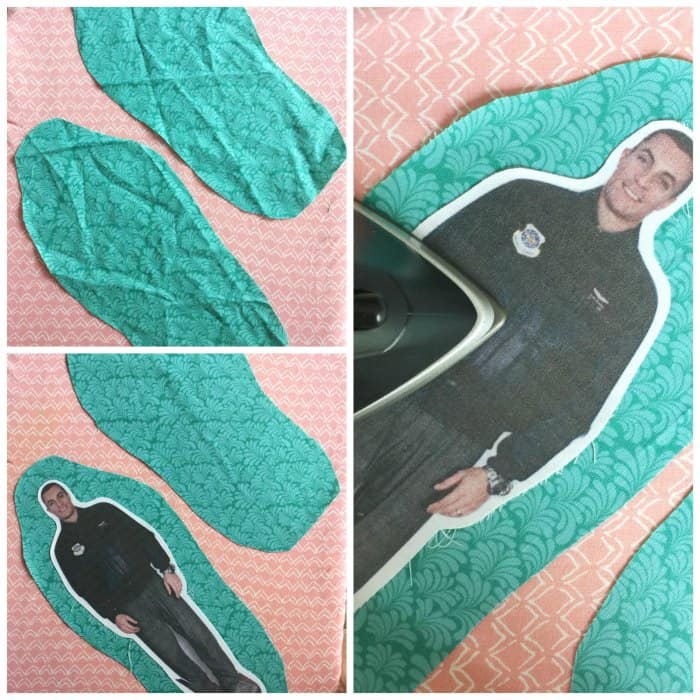
- Iron-on or pin the picture to your choice of fabric.
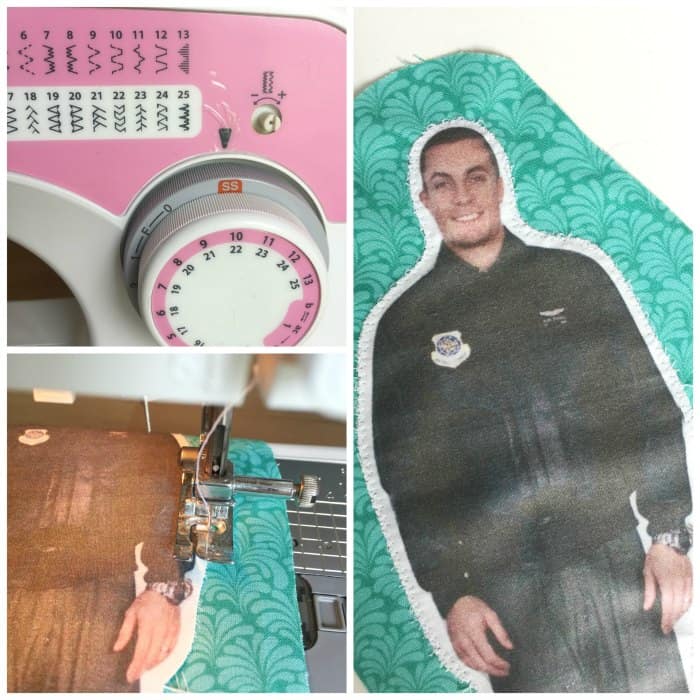
- Then you need to sew the picture to the fabric. The iron-on fabric probably won’t stick long, so sew it on even if you have the iron-on fabric.
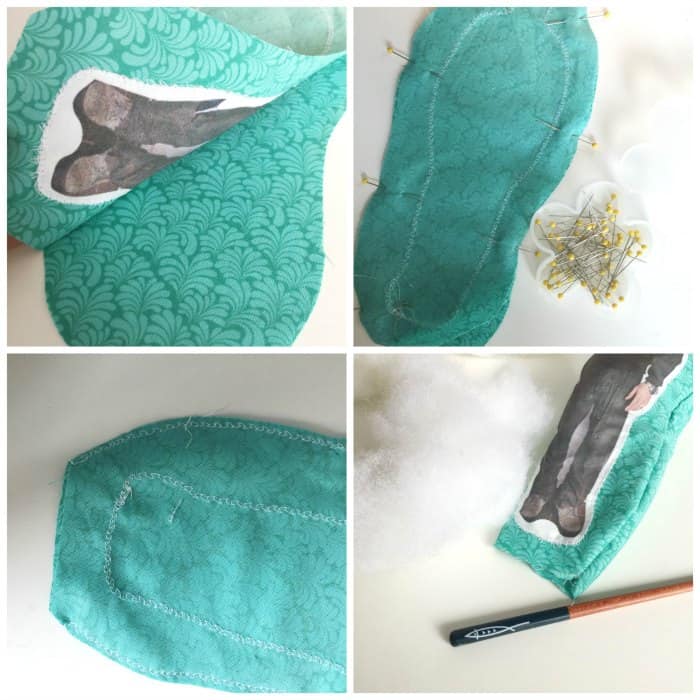
- Pin those pieces of fabric, facing-in, together and sew all along the edge. Leave a 3-4 inch gap somewhere along the edge.
- Turn the pieces inside out. Stuff the doll as much as you’d like.
- Finish it off by sewing the gap closed! And you are done! Easy!
Step-by-Step Daddy Doll Tutorial with Pictures
Steps 1-4: Follow instructions above and for the printable fabric you are choosing to use.
5. Roughly cut out the picture of mommy or daddy. I cut about an inch outside of his body so that he’d have a little white outline.
6. Cut the fabric a couple inches outside the picture of mommy and daddy. Less fabric will yield a smaller doll, more fabric will give you a larger doll. I went for a smaller doll.
7. Iron-on or pin the picture to your choice of fabric.
8. Then you need to sew the picture to the fabric. The iron-on fabric probably won’t stick long, so sew it on even if you have the iron-on fabric. I chose stitch #22 on my machine.
9. Pin those pieces of fabric, facing-in, together and sew all along the edge. Leave a 3-4 inch gap somewhere along the edge.
10. Turn the pieces inside out. Stuff the doll as much as you’d like.
11. Finish it off by sewing the gap closed! And you are done! Easy!
If you do decide you’d rather purchase a daddy or mommy doll, you can use this coupon at DaddyDolls.com (exclusive to The Military Wife and Mom readers).
The post originally appeared on The Prickly Pilots Wife. Connect with Kaitlyn Sosebee on Facebook and Pinterest.
Want more on military life?
- 9 Free Educational Programs and Resources for Military Kids
- Best Toys and Resources for Military Kids During Deployment
- 10 Books That Will Help Military Kids With Their Next PCS Move
- 47 Things No One Tells You About Being a Military Wife






What size picture did you use?
Hi Meghan!
I made the picture as big as it could get to print out unto an 8.5″ by 11″ sheet of paper!
What were the printable fabric sheets you used? I would like the sew on your not iron on due to the fabric I have but am having a hard time finding them.
How did the ink hold up? Does sweating on it or washing it make it bleed?