Sometimes I look around our house and I wonder why we have all this stuff. I’m always shoving more and more toys in the closet in attempt to minimize the toy explosion that seems to perpetually invade my house. Recently, we’ve been trying something new around here—not playing with toys at all! {shudder}
Yes. That’s right. We aren’t playing with toys. Instead, we are creatively playing with “junk” around the house and making fun and interesting toys from essentially nothing.
Why play with junk instead of actual toys?
- It costs next to nothing. Often times it’s even FREE.
- It inspires creativity.
- It nurtures appreciation for little things.
- It minimizes feelings of entitlement that sadly seems to pervade our society.
- It’s completely screen-free.
- It encourages more interactive play with parents, which is what kids both crave and need.
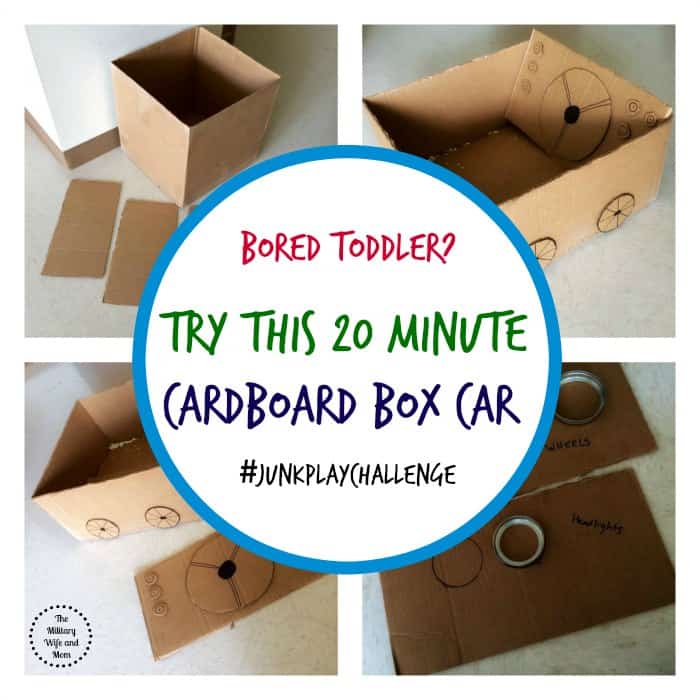
Our most recent “junk” play adventure involved a cardboard box car, and the best part is it costs pennies to make and it will create hours of fun for a bored toddler!!
How to make a 20 minute cardboard box car:
Supplies needed:
- Cardboard box
- Sharpie
- Glue
- Scissors
- Mason jar lid or other circular object
Steps to complete:
First I just wanted to say that I am horribly UN-crafty. So this project is for all parents and kids at any level. I intentionally made it that way! I want anyone to feel confident doing this activity in a short amount of time!!
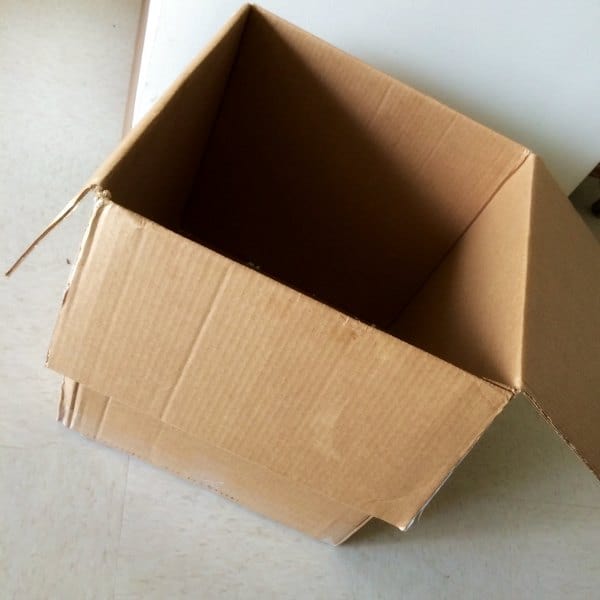
Step 1 – Gather your supplies. Here is the box I used. Any old box that you get a package in will do. You simply want it to be big enough for your kid to fit into 🙂
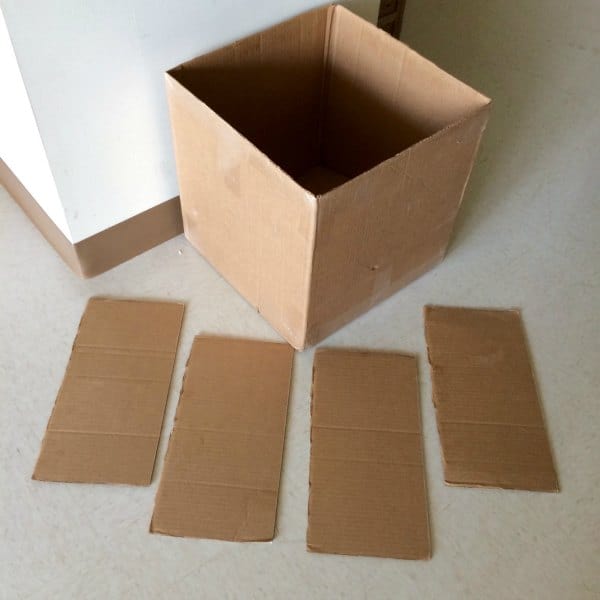
Step 2 – Cut off the tops of the box.
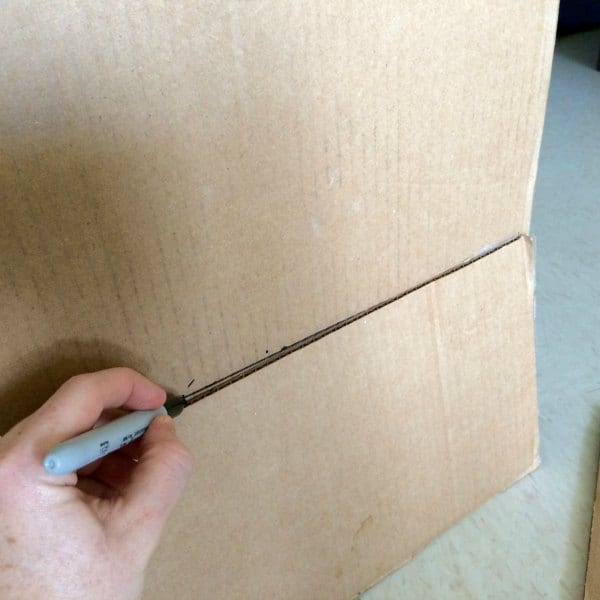
Step 3 – Using one of your cutoff flaps as a measuring tool, outline your box car to cut down the box to a more reasonable height, if needed. My box was way to tall to function as a car. Simply place the flap against the box and trace along the outside of the box. Then cut off the top part of the box.
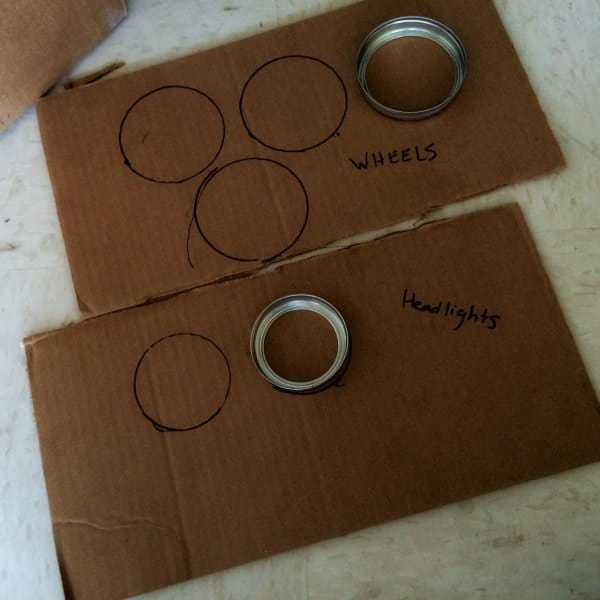
Step 4 – Using one of the cutoff flaps, make the headlights and wheels. I used a large mouth mason jar lid for the wheels and a small mouth mason jar lid for the headlights and taillights. Just take your sharpie and trace around the edge. Easy-peasy!
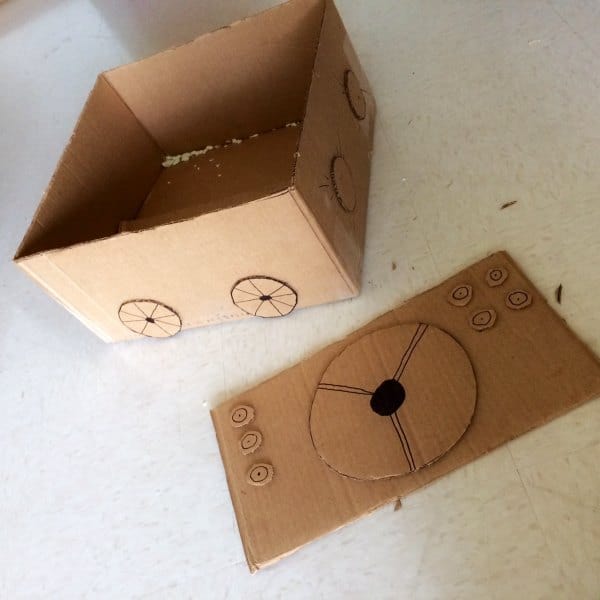
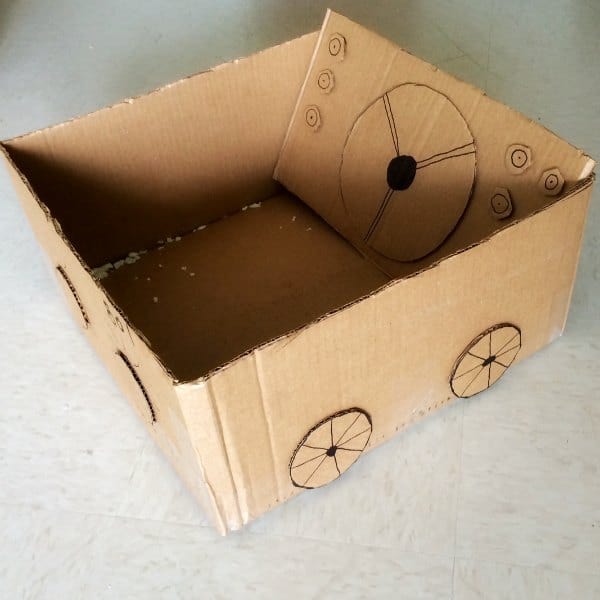
Step 5 – Draw a wheel design on the wheels. Cut out your wheels and lights and glue to the outside of the box. This need not be perfect, nor symmetrical. Add a few light beams using your sharpie once the headlights and taillights are in place. Using one of the cutoff flaps, create a dashboard. Add a steering wheel and some buttons. I free handed the cutting with the dashboard and seemed to turn out just fine 🙂
Step 6 – Insert dashboard into car and enjoy hours of fun, creative, and imaginative play! Of course, you can always make this car a little more detailed, add color, stickers, or get more creative with the parts. My goal for junk play is to keep it simple though. The easier and more time efficient these projects are, the more likely we are to continue creative junk play than to resort back to regular toys. Hooray for that!
Looking for more awesome ideas to use junk in your home to creatively play with your kids?
Check out the 60 Day Creative Junk Play Challenge from Best Toys 4 Toddlers!!
Want more on toddlers?
- For All the Moms of Toddlers
- How to Help Toddlers Cope with Big Emotions
- 9 Phrases That Change Life with a Toddler
Do you think you could replicate this cardboard box car in 20 minutes? Let’s chat in the comments!
I've created a free email series just for you!
If you are struggling with feeling happy in motherhood, let me help you streamline your family's daily routines so you can enjoy your family life without the stress. Yes, really. I've seen my routines work time and time again for parents. I know it can work for you too.
This free email series will help you:
- Free sample routines for your child
- Best morning routine tips and tricks your kids will actually follow
- All-time favorite parenting hacks for getting more cooperation at bedtime
- Step-by-step guide for using a printable daily schedule with kids









This car is totally amazing! Love how many details you added! Thank you for joining 60 Day Junk Play Challenge!
You are so welcome! We had such a fun time putting it together and playing with it for hours after!